Backstage Series #1: Getting Started with Backstage

Updated (March 2026): This article was updated to reflect the latest changes in Backstage. Node.js requirements (now v22+), Yarn version (now v4.4.1 via Corepack), the start command (
yarn startinstead ofyarn dev), and the bundler (Rspack instead of Webpack) were all updated.
What is Backstage?
Imagine you’re at a company with dozens (or hundreds) of microservices, CI/CD pipelines, documentation scattered all over the place, and every team using different tools. Total chaos, right? Well, that’s where Backstage comes in.
Backstage is an open source platform created by Spotify that works as a unified developer portal. Think of it as a centralized “hub” where you can:
- Catalog all your services, APIs, and resources in one place.
- Create new projects from standardized templates (say goodbye to copying and pasting repos).
- View technical documentation without leaving the platform.
- Integrate tools like Kubernetes, GitHub, CI/CD, monitoring, and much more through plugins.
In short, Backstage helps you bring order to the chaos and gives your team a unified experience for managing all your infrastructure and services.
What is it really for?
Let me put it simply: if you’ve ever asked yourself “who owns this service?”, “where’s the documentation for this API?”, or “how do I create a new microservice following the team’s standards?”, then Backstage is for you.
Its main capabilities are:
- Software Catalog: An inventory of everything your organization has — services, APIs, libraries, pipelines, etc.
- Software Templates: Templates for creating new projects in a standardized way. You define the template once and any dev can use it.
- TechDocs: Technical documentation that lives alongside the code and renders automatically in Backstage.
- Plugins: A huge ecosystem of plugins that extend functionality — from Kubernetes to PagerDuty.
Local Installation
Let’s get to the good stuff. To install Backstage on your machine, you need to have:
- Node.js (version 22 or 24 — Active LTS)
- Yarn (version 4.4.1 — installed via Corepack)
- Git
- Docker (optional, but recommended for the database)
- Build tools (
makeandbuild-essentialon Linux, orxcode-select --installon macOS)
If you use nvm, you can install the correct Node version like this:
nvm install 22And to enable Yarn 4 via Corepack:
corepack enableBackstage is designed for Unix environments (Linux/macOS), but you can use it on Windows with WSL2 (Windows Subsystem for Linux). Here’s how to set up your environment:
Install WSL2 — Open PowerShell as administrator and run:
wsl --installThis installs Ubuntu by default. Restart your machine when it’s done.
Enter WSL — Open a terminal and type
wslor search for “Ubuntu” in the start menu.Install dependencies inside WSL:
sudo apt update && sudo apt install -y build-essential curl gitInstall Node.js with nvm (inside WSL):
curl -o- https://raw.githubusercontent.com/nvm-sh/nvm/v0.40.1/install.sh | bash
source ~/.bashrc
nvm install 22
corepack enable
From here on, all the Backstage installation commands are the same. Just make sure you always run them inside WSL, not in PowerShell or CMD.
Step 1: Create the Backstage app
Open your terminal and run:
npx @backstage/create-app@latestIt will ask you for the name of your app. Give it any name you want, for example mi-backstage:
? Enter a name for the app [required] mi-backstageThis will create a folder with the entire project structure. Grab a coffee while the dependencies install, because it takes a little while.
Step 2: Enter the directory
cd mi-backstageStep 3: Start Backstage in development mode
Now comes the exciting part. To start Backstage locally, just run:
yarn startThis command starts both the backend and the frontend in development mode. After a few seconds, you should see something like this in your terminal:
[0] Rspack compiled successfully
[1] Listening on :7007
Open your browser and go to http://localhost:3000 and you should see the Backstage interface up and running.
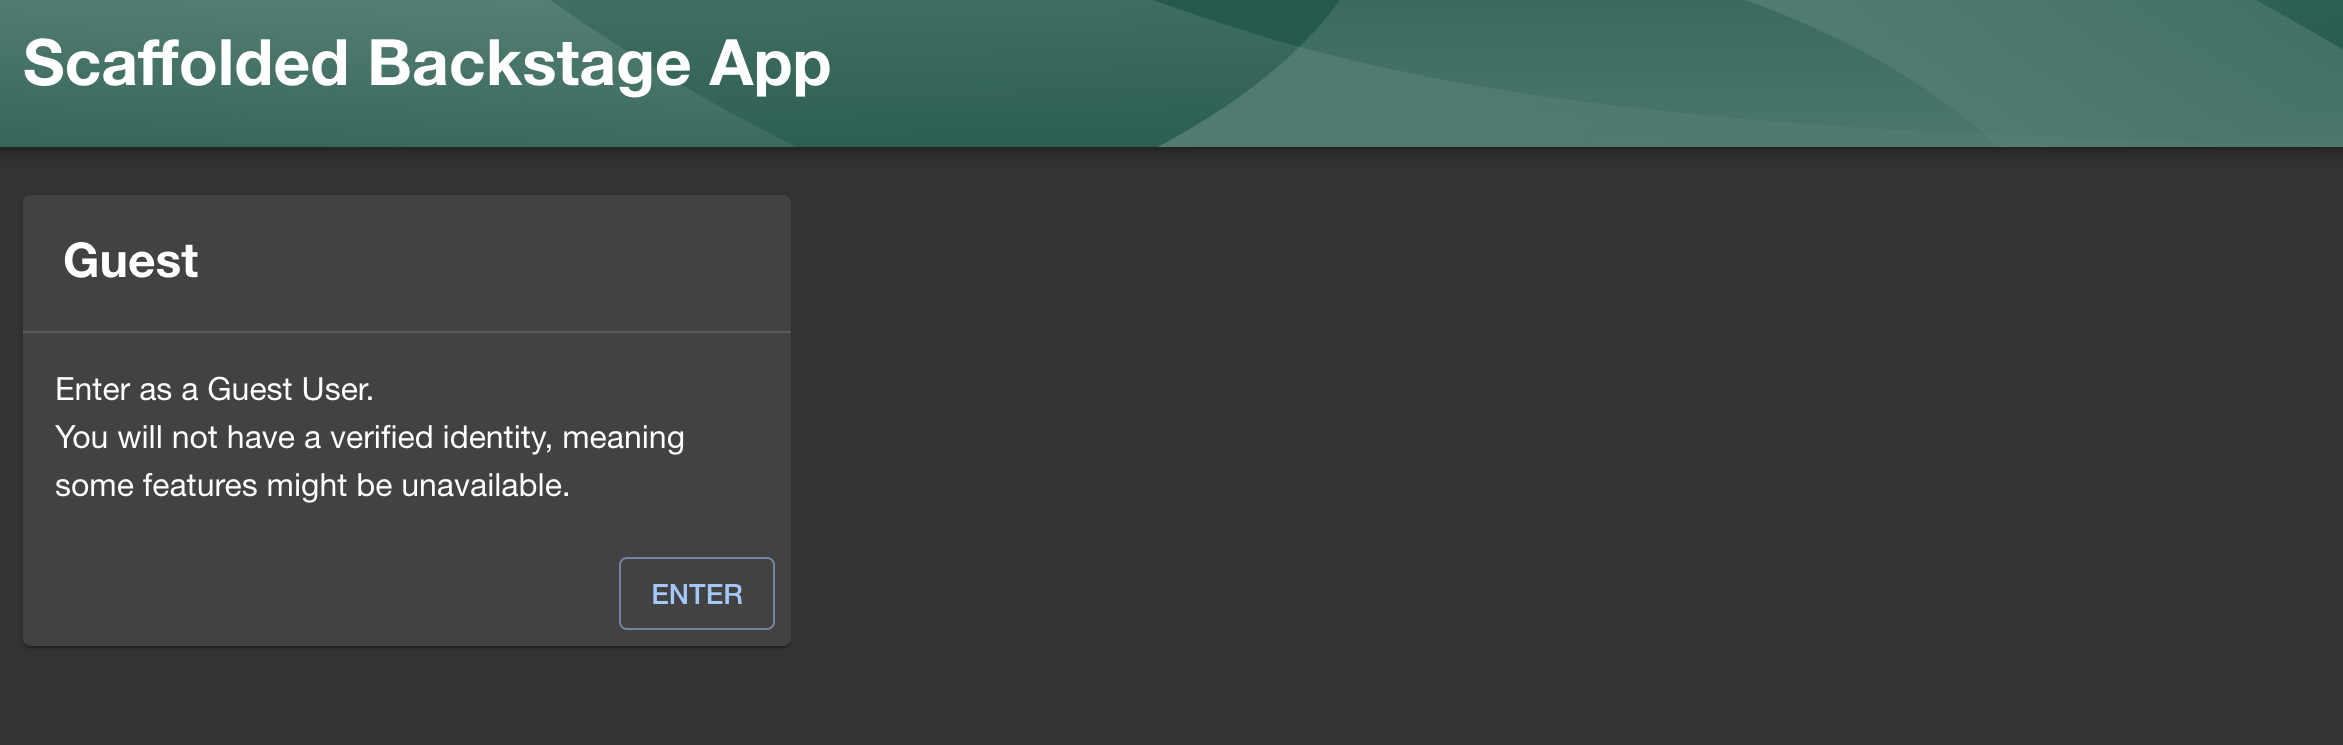
Backstage running locally
Just like that! You now have Backstage running on your machine.
Integrations: Kubernetes, GitHub, and more
Now, where Backstage really shines is in its integrations. Let me tell you about the most interesting ones:
Kubernetes
With the Kubernetes plugin, you can see the status of your deployments, pods, and services directly from Backstage. Imagine being able to view a pod’s logs or check if a deployment is healthy without having to open kubectl in the terminal. All from a friendly visual interface.
GitHub
The GitHub integration lets you:
- Authenticate with GitHub OAuth.
- Discover repositories automatically and add them to the catalog.
- Trigger GitHub Actions from templates.
- View pull requests and issues related to a service.
Authentication and Authorization
Something very important when we’re talking about a platform like Backstage is how to manage who has access and what they can do. And the good news here is that Backstage is quite flexible. It supports several authentication mechanisms that you’re probably already using in your organization:
- OAuth 2.0: Connect with providers like GitHub, GitLab, Google, Microsoft, Okta, among others. This is the most common way to authenticate users.
- OIDC (OpenID Connect): If your company uses an OIDC-compatible Identity Provider (like Keycloak, Auth0, or Azure AD), you can integrate it directly. This gives you Single Sign-On (SSO) without much hassle.
- Service Accounts (SA): For machine-to-machine integrations or automated processes, you can use service tokens. Very useful when you have CI/CD pipelines that need to interact with the Backstage API.
- SAML 2.0: If your organization still uses SAML (quite common in large enterprises), Backstage supports it too.
- Guest Access: For development environments or demos, you can enable access without authentication. Obviously, don’t use this in production.
The interesting thing is that you can combine multiple providers. For example, having GitHub OAuth for developers and OIDC with Keycloak for operations teams. Backstage lets you configure multiple authentication providers at the same time.
Other Popular Integrations
- ArgoCD: Visualize the status of your GitOps deployments.
- Jenkins / GitHub Actions: Monitor your CI/CD pipelines.
- PagerDuty: See who’s on call for each service.
- Grafana: Embedded monitoring dashboards.
- SonarQube: Code quality metrics.
Practical Example: Kubernetes Deployment Template
One of the most powerful features of Backstage is Software Templates. Let’s look at an example of how to create a template that generates a Kubernetes Deployment. The idea is that any developer can create a deployment just by filling in a few fields like the app name, namespace, number of replicas, and the image.
Where to place the template?
Templates are defined in YAML files and are generally organized like this within your Backstage project:
mi-backstage/
├── templates/
│   └── kubernetes-deployment/
│       ├── template.yaml          # Template definition
│       └── skeleton/
│           └── deployment.yaml    # The file that will be generated
The template.yaml file is what Backstage reads to know which parameters to ask for and which actions to execute. The skeleton/ directory contains the files that will be generated with the values the user enters.
Register the template in Backstage
For Backstage to recognize your template, you need to add it in the app-config.yaml file under the catalog.locations section. Simply add an entry pointing to your template.yaml:
catalog:
  locations:
    # ... other locations you already have ...

    # Kubernetes Deployment template
    - type: file
      target: ../../templates/kubernetes-deployment/template.yaml
      rules:
        - allow: [Template]
With this, when you start Backstage and go to the “Create” section, your template will appear ready to use.
The template YAML
Here’s an example of template.yaml:
apiVersion: scaffolder.backstage.io/v1beta3
kind: Template
metadata:
  name: kubernetes-deployment
  title: Kubernetes Deployment
  description: Crea un Deployment de Kubernetes con los parámetros básicos
  tags:
    - kubernetes
    - deployment
spec:
  owner: team-platform
  type: service

  parameters:
    - title: Configuración del Deployment
      required:
        - appName
        - namespace
        - replicas
        - image
      properties:
        appName:
          title: Nombre de la aplicación
          type: string
          description: El nombre de tu aplicación
          ui:autofocus: true
        namespace:
          title: Namespace
          type: string
          description: El namespace de Kubernetes donde se desplegará
          default: default
        replicas:
          title: Réplicas
          type: number
          description: Cantidad de réplicas del deployment
          default: 2
        image:
          title: Imagen Docker
          type: string
          description: "La imagen del contenedor (ej: mi-registro/mi-app:latest)"

  steps:
    - id: fetch-skeleton
      name: Generar archivos
      action: fetch:template
      input:
        url: ./skeleton
        values:
          appName: ${{ parameters.appName }}
          namespace: ${{ parameters.namespace }}
          replicas: ${{ parameters.replicas }}
          image: ${{ parameters.image }}

    - id: publish
      name: Publicar en GitHub
      action: publish:github
      input:
        allowedHosts: ["github.com"]
        repoUrl: github.com?owner=tu-org&repo=${{ parameters.appName }}-deployment
        description: "Deployment de ${{ parameters.appName }}"

  output:
    links:
      - title: Repositorio
        url: ${{ steps.publish.output.remoteUrl }}
The Deployment skeleton
And this would be the skeleton/deployment.yaml file that gets generated with the entered values:
apiVersion: apps/v1
kind: Deployment
metadata:
  name: ${{ values.appName }}
  namespace: ${{ values.namespace }}
  labels:
    app: ${{ values.appName }}
spec:
  replicas: ${{ values.replicas }}
  selector:
    matchLabels:
      app: ${{ values.appName }}
  template:
    metadata:
      labels:
        app: ${{ values.appName }}
    spec:
      containers:
        - name: ${{ values.appName }}
          image: ${{ values.image }}
          ports:
            - containerPort: 8080
          resources:
            requests:
              memory: "128Mi"
              cpu: "250m"
            limits:
              memory: "256Mi"
              cpu: "500m"
With this template, a developer just has to fill in the fields in the Backstage UI and the deployment is automatically generated with best practices. No more copying and pasting YAMLs from one place to another.
This is what the Backstage UI looks like
To give you an idea of what Backstage looks like in action, here are some screenshots:
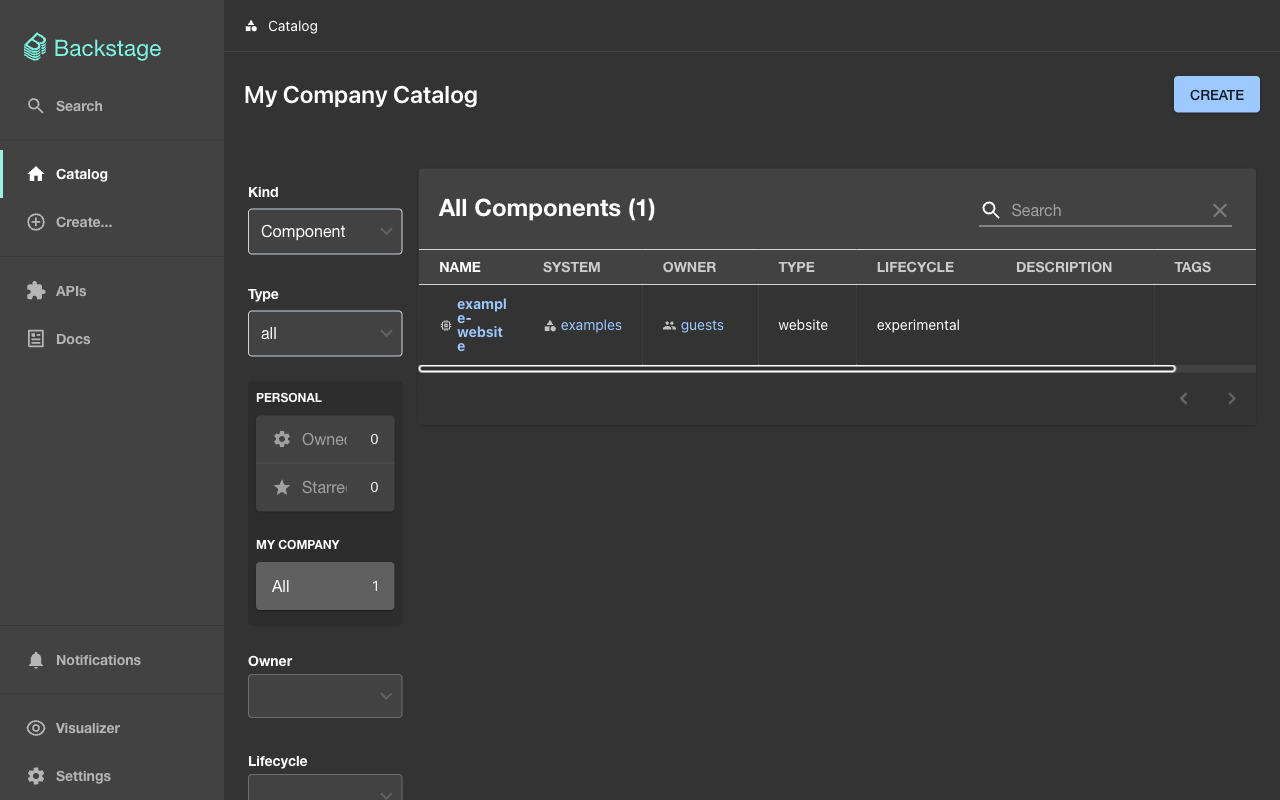
Software Catalog view
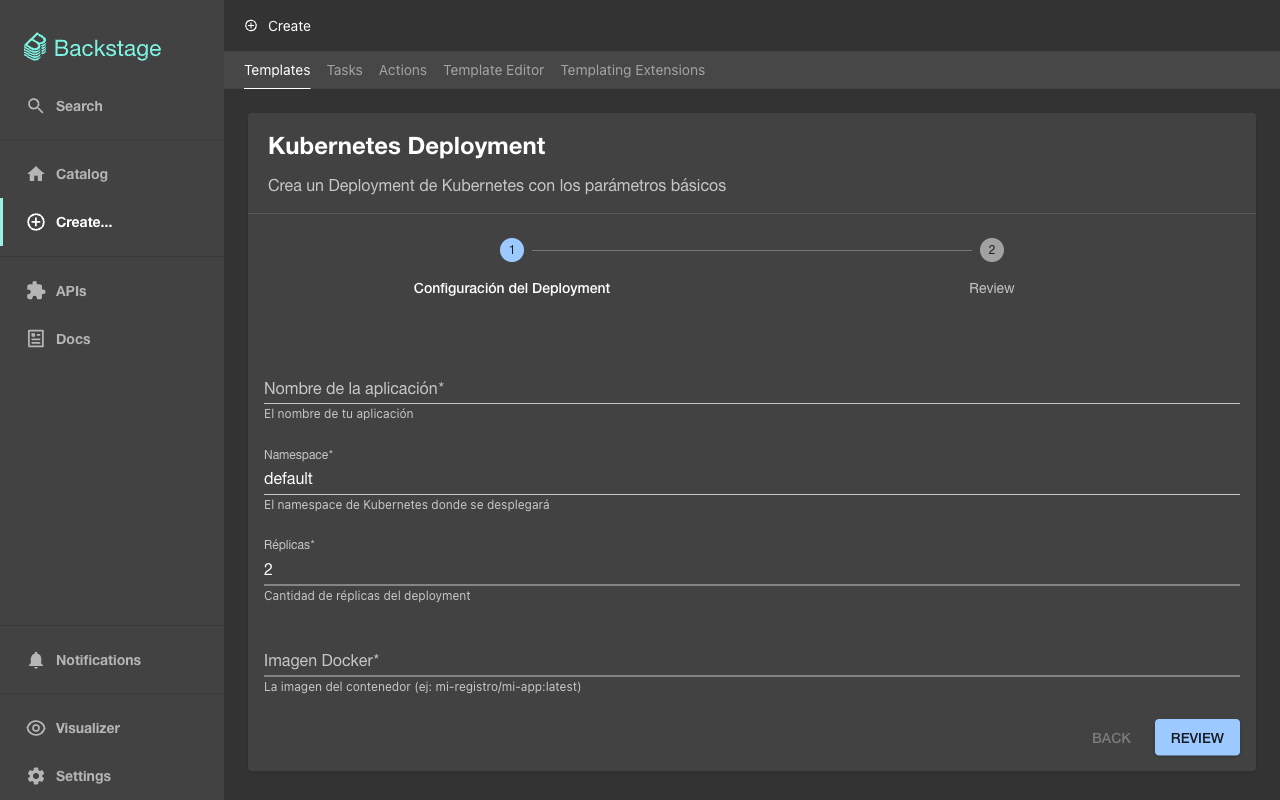
Software Template form
Wrapping Up
And that’s it for this first installment of the Backstage Series. This was just a first look at what this technology has to offer. As you saw, Backstage isn’t just another tool — it’s a platform that can transform the way your team manages services, documentation, and infrastructure.
In the next installments of this series, we’re going to go deeper. We’ll explore topics like:
- How to configure the Software Catalog with real entities.
- Creating more advanced templates with multiple steps.
- Integrating Backstage with Kubernetes and ArgoCD.
- Customizing the UI and creating your own plugins.
So stay tuned, because this is just the beginning. If you have questions or want me to cover something specific, don’t hesitate to leave a comment.
See you in the next one! 🚀